Showing posts with label recipe. Show all posts

Saturday, October 12, 2013

The Smart Lady's Guide to Homemade* Hummus


Have you ever looked up a recipe for hummus from a chef or blogger that's really, really good? The standard recipe is: garbanzo beans, olive oil, tahini, seasoning. Process it all together.

Then, there are those that reallyyyyy know their stuff, that go above and beyond, and they add one very special step. They are happy to tell you the secret to the smoothest, creamiest hummus.

Do you know what it is?

De-shelling the freaking garbanzo beans.

Seriously. Every, single one. Here's what you do. There's a really thin layer (membrane? Worst. Word. Ever.) that covers every single little pea bean and if you pinch the outsides of it gently, it'll pop right out of that shell. Discard the shell. High five! You did ONE bean. Now, do a thousand.

No thanks! I did it once and it was smoother and creamier but I like to think of things in terms of effort and return. I am not convinced the effort was worth the return.

So, I have my own, lazy cook's secret for hummus. This is mostly just for entertaining in my book, but if you regularly make yourself fancy homemade hummus, #respect. This will work for you too. Ready? It's.........


Buy Sabra!

I like the garlic kind, but any kind will work (and honestly, so will any brand, I just happen to be particular to Sabra.) Mix it up so it looks smooth and creamy, then take it out of that plastic container and put it into a proper bowl.

Drizzle it with olive oil. If you have flavored olive oil, this is even better. We have a chili infused olive oil that is out of this world. Then, add some chili flakes and a big sprinkling of oregano. It'll make glorious little rivers and pools of extra flavor that is my 30 second version of "above and beyond." Mix it up a tiny bit but don't combine it totally. It loses both flavor and effect!

Ta da!

It looks better, tastes amazing, and I'm pretty sure the Sabra factory de-shells those bad boys for you because it's perfectly creamy and you'll enjoy an hour of your life that otherwise could have been spent de-membraning those glorious but tricky little Mediterranean beans.

Cheers friends, and happy weekend!

Wednesday, October 9, 2013

The Pioneer Woman's Salmon, or The Easiest Dinner In The World


Say that thinking of The Most Interesting Man in the World.

Tonight, there were important things to get to than dinner. Building a coffee table and last week's DVR'd Scandal in particular. The fact that both of those things are happening right now, today, and not 4 months ago/one week ago respectively is bananas. The coffee table is one of the FIRST things we wanted for our new place and I've waited anxiously for months for Scandal to come back, so yeah. How do these things get away from me? WHERE ARE MY PRIORITIES?

I digress. Salmon! Oh my gosh, this is so good and so easy it's not even fair. I'm a sucker for a good love story and good food, so it was love at first read for me and the Pioneer Woman's blog. And now that she's regularly on the Food Network, I fully (irrationally? maybe?) think of her as my friend. She's so nice! She'd like me, I know it.

So, when I walked past these beautiful, huge pieces of salmon tonight at the grocery store, my mind went straight to my BFF Ree.

Her recipe for salmon (which is actually a recipe from a friend of hers) is so simple. Rub salmon filets with olive oil, salt and pepper. Put the filets on a baking sheet, put it in a cold oven and turn the oven on to 400. After 25 minutes, take out your salmon and you will guaranteed have perfectly flaky, perfectly cooked salmon on your hands.

A few tips:

  • Wrap your baking sheet in tin foil for minimal dish washing. I do this whenever possible, I am that lazy. With salmon, I consider this step non-optional.
  • This is a great base recipe for any sort of salmon you want. In my world, pretty much nothing is getting in my oven without at least two spices on it and salt and pepper do not count. Neither does garlic. I added a lot of lemon pepper and dill to the salt and pepper and it. was. awesome. I've also used this method for miso salmon and a mustard glazed salmon, both good too!
  • My salmon filets were quite possibly the biggest I'd ever seen, and were particularly thick. If that photo is not doing a good job of proving it, note that that is a DINNER PLATE, not a small plate. So, I knew they'd need a little longer to cook than 25 minutes and let them go just one extra minute, then took the pan out and tented it with foil, allowing very little air to escape. This helped the salmon keep cooking gently while the broccoli roasted.
  • Speaking of broccoli roasting, it's pretty much my favorite thing ever. Pop another sheet pan (use that foil again!) in the oven with chopped broccoli, drizzled with olive oil, salt, pepper and garlic powder if you please. This should go in at the same time as the salmon, but it'll need an extra 15 minutes to get extra crispy (turn the oven up to 475 if you like it extra crispy like mine) which is coincidentally the perfect amount of time to make couscous and pour yourself a glass of wine.
The table's done! I clearly had nothing to do with this considering I just wrote nineteen paragraphs about the "easiest salmon ever." Anyway. I'd take a photo of the table but low-light photography and I are not friends yet. Someday, someday.

Olivia Pope (another good friend) awaits.

Cheers, friends!


Monday, July 29, 2013

Chicken and Tomato Skewers with Watermelon Feta Salad


Until I was about 22, I was a horrific cook. Not just not good, but certifiably bad. My mother and sister are still traumatized from the Garlic Scrambled Eggs Incident of 1999.

Happily, I can now hold my own in the kitchen -- quite nicely, if I do say so myself. I can saute, bake, pan fry, broil, simmer, roast with the best of them. I think that my love of eating food (all food) inspired me to just keep on cookin' it until eventually it started to suck a tiny bit less and every small victory inspired just enough confidence that I'd slowly became less and less freaked out by the whole production. Confidence is key! (Deep thoughts by Laura.) I'm no chef, but I've come a long way from those eggs.

But put me out on the patio with a grill, and all bets are off. I do not have enough practice under my belt (fire-proof apron?) to keep my cool when faced with a raging fire that's hellbent on eating my flank steak before I do or the patience to help along a little flame that refuses to help a chicken breast up and out of the salmonella  range.

I seriously considered chucking a drumette off the balcony the other day. #grillingproblems

So all in all, I'd say my current grilling ratio is about 50/50.

I'm pleased to report that this little dinner was solidly in the good 50%, and you can rest assured that means that it's not just good, but really, really easy. Light, summery, flavorful, and all done in about 25 minutes. Cheers!

Grilled Chicken and Tomato Skewers

  1. Cut chicken into 1" cubes and marinate at least an hour in olive oil, lemon juice, herbs (I used garlic and oregano), salt and pepper
  2. Prepare grill - light, clean, and use a grill spray or lightly oil the grates
  3. Skewer chicken and tomatoes, alternating until each skewer is full with about an inch or two of space at the end
  4. Grill until chicken is cooked through and tomatoes are slightly blistered, rotating once to ensure even char
  5. Tent the chicken on a plate to rest for 5-10 minutes before serving


Watermelon and Feta Salad

  1. Cube watermelon and feta and place atop arugula. 
  2. Drizzle with balsamic glaze (plain balsamic would work just fine!), sprinkle with salt and pepper


Sunday, February 24, 2013

Flourless Chocolate Cake with Coconut Oil

IMG_1794-001
Apologies for the underwhelming photo. I think I need to read up on food styling... 

When a few last minute things popped up and I couldn't make it to CBN's Oscar party at Nellcote, to say that I was disappointed would be an understatement. So I did what any rational girl would do with a night alone, a mile-long list of things to take care of, and plans to be out of town the whole week: I baked a cake.

And not just any cake, a flourless chocolate cake that I topped with almond butter frosting. I think I could start an entire cookbook of recipes entitled, "Recipe Alterations That Don't Require Me To Leave My Apartment", because I made some interesting substitutions in the name of laziness that somehow resulted in a really good end product. It was fudgy, dense, and not too sweet (until I covered the whole thing with a sugary almond butter frosting.)

This was very loosely adapted from Nigella Lawson's chocolate olive oil cake.

Flourless Chocolate Cake with Coconut Oil


  • 1 3/4 C + 2 Tb cocoa powder

  • 1/2 tsp baking soda

  • 1/2 tsp salt

  • 1 C coffee, cooled

  • 3 eggs

  • 2/3 cup coconut oil, melted

  • 1 C white sugar

  • 1 1/2 Tb vanilla


  1. Preheat the oven to 325 degrees F and prepare an 8x8" pan by lining it with parchment paper. If you don't usually use parchment paper, tear a piece big enough so that it hangs over the edges of the pan a bit so that you'll be able to lift the cake out by pulling up the edges of the paper later. Parchment paper makes baking infinitely easier both in terms of cleanup and in the dreaded step of removing baked goods from the pan!

  2. Sift together your salt, baking soda and cocoa powder, then set it aside.

  3. In a new bowl, whisk together the eggs, coconut oil and vanilla, then add your sugar and mix until its smooth, creamy and custardy.

  4. Now pour the coffee into the egg and sugar mixture, and stir until its completely combined.

  5. Next, slowly add the cocoa powder into the wet ingredients, stirring it in bit by bit. Take your time or it'll get clumpy and harder smooth out!

  6. Once it's all mixed together and very smooth (it'll be really liquid-y!), pour the batter into your pan. Bake for about 35-40 minutes, or until you can stick a toothpick in the middle and it comes out clean.

  7. Lift the cake out of the pan by the parchment paper and set it aside to cool. Once it's cooled for about 20 minutes (be patient!), you're ready to frost! You could eat it plain, but what's the fun in that?

For my frosting, I combined 1/2 cup of almond butter with 1/4 cup of melted coconut oil, 1 cup of sugar and 1 tsp of salt. Powdered sugar would have resulted in a smoother frosting, similar to a buttercream, but I didn't have it and didn't mind the grainier texture... it reminded me a bit of Reeses filling!

Off to put my sugar high to good use and finish up my work.

ll

Thursday, February 21, 2013

Roasted Tomatoes

IMG_1629

IMG_1623

IMG_1645

This isn't really so much of a recipe as "put them in the oven" isn't exactly a novel concept. But I thought it might be worth sharing, anyway, since sometimes something so simple as putting them in the oven makes the painfully ordinary surprisingly good.

With the particularly evil combo of negative windchills and post-vacation food guilt, cold salads are not exactly cutting it when I literally dreamed of macaroni and cheese last night. I can't roast cheese for you (OR CAN I?), but I can improve on the cold salad business.

Roasted Tomatoes


  • Preheat your oven to 350 degrees.

  • Cut your tomatoes into evenly-sized pieces and place on a foil covered pan for easy clean-up.

  • Sprinkle to taste with salt, pepper, sugar, and seasoning. On 5 tomatoes, I used about 1 tsp of salt, 1 tsp pepper, and one Tb of sugar. Skip anything else, but don't skip the sugar -- it's what'll make your tomatoes caramelize a bit!

  • Drizzle with olive oil, balsamic vinegar, and sprinkle with any other seasonings you like - I used a bit of oregano.

  • Roast for 30 minutes. If you'd like them a bit extra crunchy and black on top, pop them in the broiler for 2 minutes at the end for charred edges.

  • Serve with other roasted vegetables, on top of your salad to warm it up, or as a side dish.

ll

Monday, January 21, 2013

Chicken and Kale Burgers

Image

Image

Image

Image

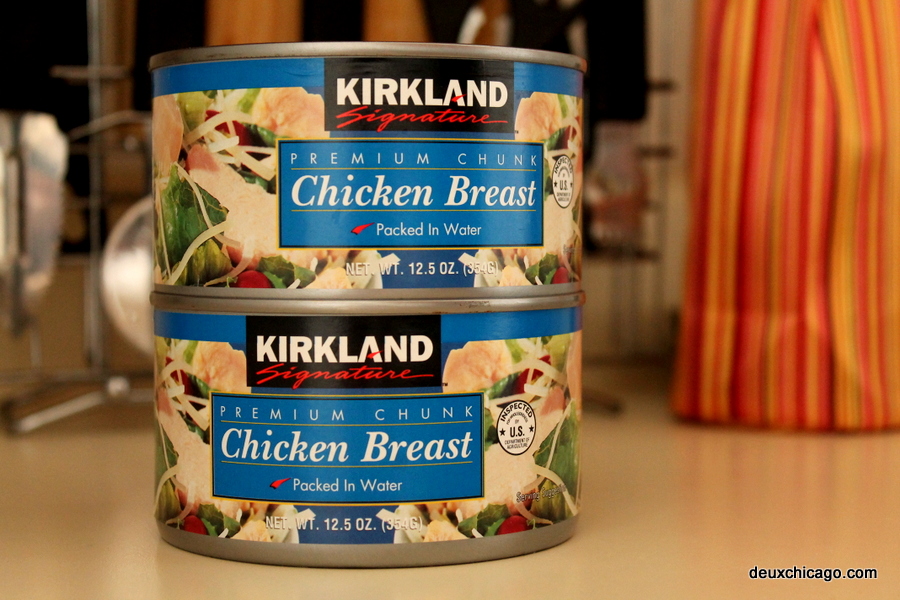
I had two cans of chicken breast on hand this weekend, and to save myself from myself and the extremely strong temptation to throw some mayonnaise in there and call it a day, I decided to get creative.

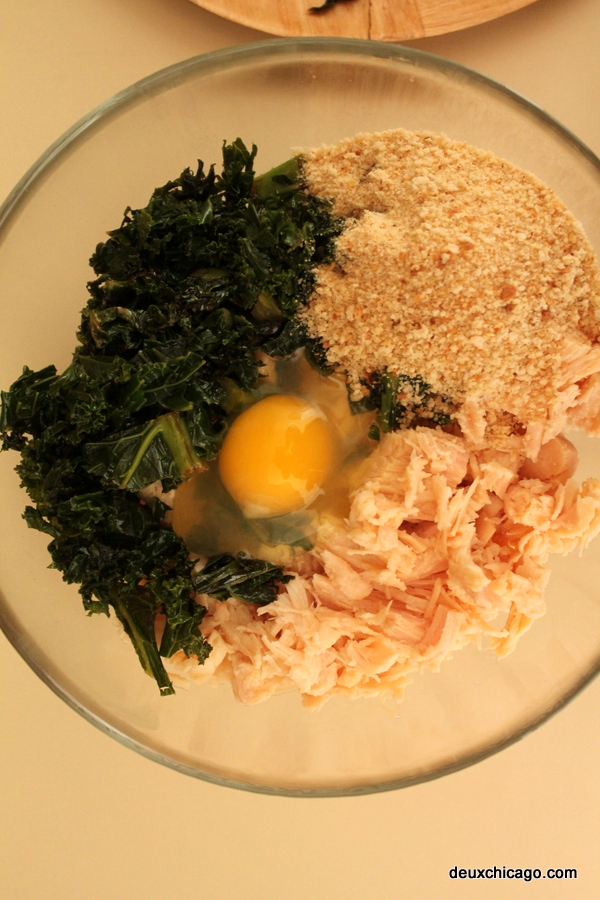
I added sauteed kale to the mix with organic breadcrumbs, an egg and seasoning, then pan fried the patties for a quick and healthy lunch with lots of flavor.

Chicken & Kale Burgers


Makes 4 burgers

  • 2 10-oz. cans chicken breast

  • 1 Egg

  • 1/4 Cup breadcrumbs

  • 1 Cup kale leaves, stems discarded

  • 1 Tb worcestershire sauce

  • 1 tsp chili pepper flakes

  • 1 Tb lemon juice

*This may be the only recipe you'll ever see from me that does not include adding salt, but I strongly recommend against it -- the chicken is already salty! 

  1. Sautee kale leaves in olive oil until soft. Alternatively, you could steam the kale. Set aside to cool.

  2. Drain chicken breast, then add to a bowl with egg, breadcrumbs, and kale.

  3. Use your hands to mix all of the ingredients together - there's really no way around getting in there and getting your hands dirty! A spoon won't cut it.

  4. Add worcestershire sauce, chili peppers, and lemon juice.

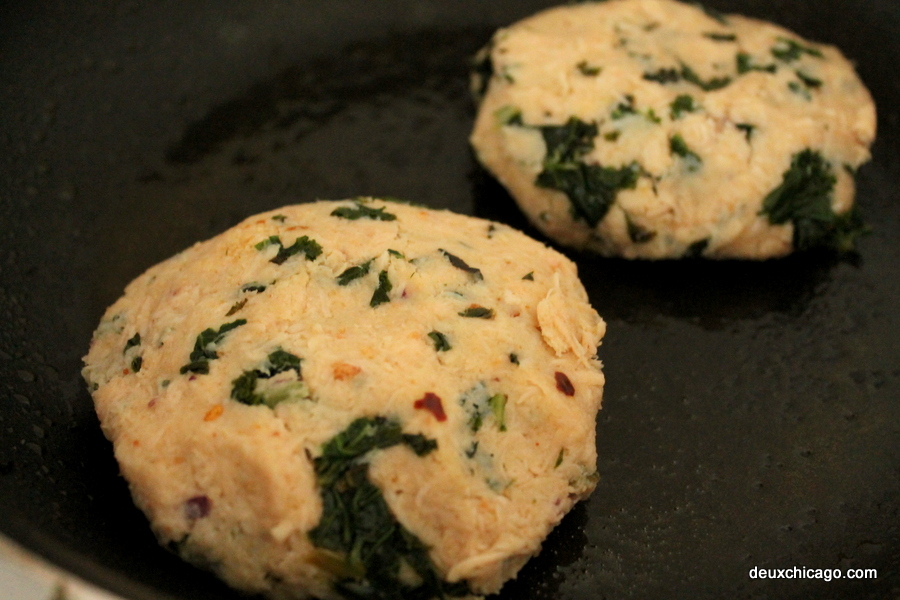
  5. Mix it all up again, then divide mixture into four sections. Form one burger out of each section, rolling it into a ball and then flattening.

  6. Fry in a pan prepared with olive oil spray over low heat, flipping once until heated through and golden brown on each side.

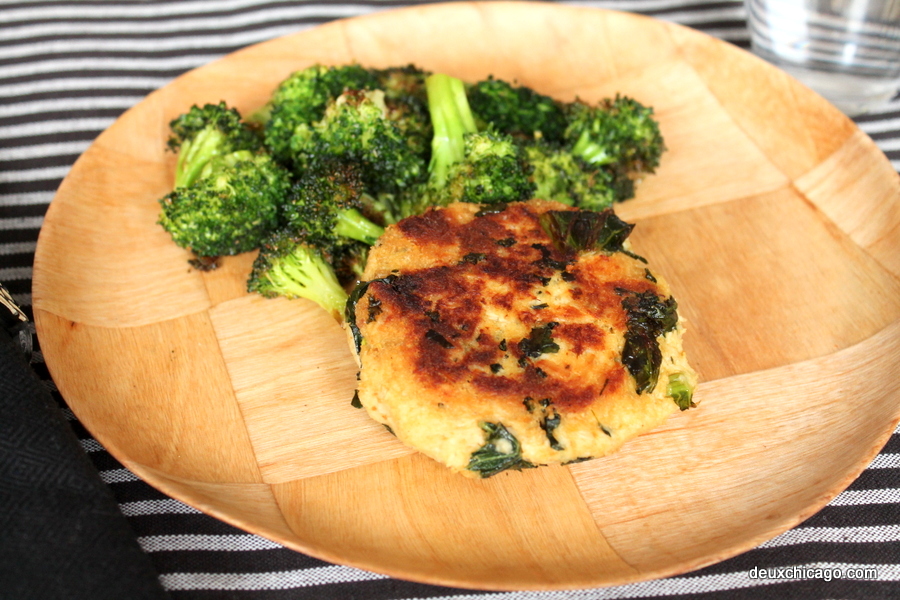
  7. Eat! This would be great on a bun with condiments and extra veggies, but was juuust fine on a plate with spicy ketchup.

ll

Friday, November 30, 2012

Peanut Butter Stuffed Chocolate Chip Cookies

peanut-butter-chocolate-chip-cookies-2


Do you see that cross-section of peanut butter goodness? I am drooling as I type this.


Our supremely sweet-toothed "baby" brother's birthday was last weekend, and we decided there was no better way to send him back to school than armed with a disgusting amount of sweet treats.

College-aged metabolisms can handle the madness :)

peanut-butter-chocolate-chip-cookies-batter


peanut-butter-chocolate-chip-cookies-dough


I fear that I have set the bar pretty high for myself with the Slutty Brownies, so just any old cookie wouldn't do.


So I took the world's best chocolate chip cookie recipe, the Nestle Tollhouse classic, but only used half of the chocolate chips it called for. Then I squished a little Reeses baking square down into each spoonful and covered it with a smidge more dough.

The cookies were much bigger than usual to accommodate the Reeses so they took longer to bake, but it was worth the wait.

peanut-butter-chocolate-chip-cookies

Without question, one of the best things I've ever made!

ll

Tuesday, November 27, 2012

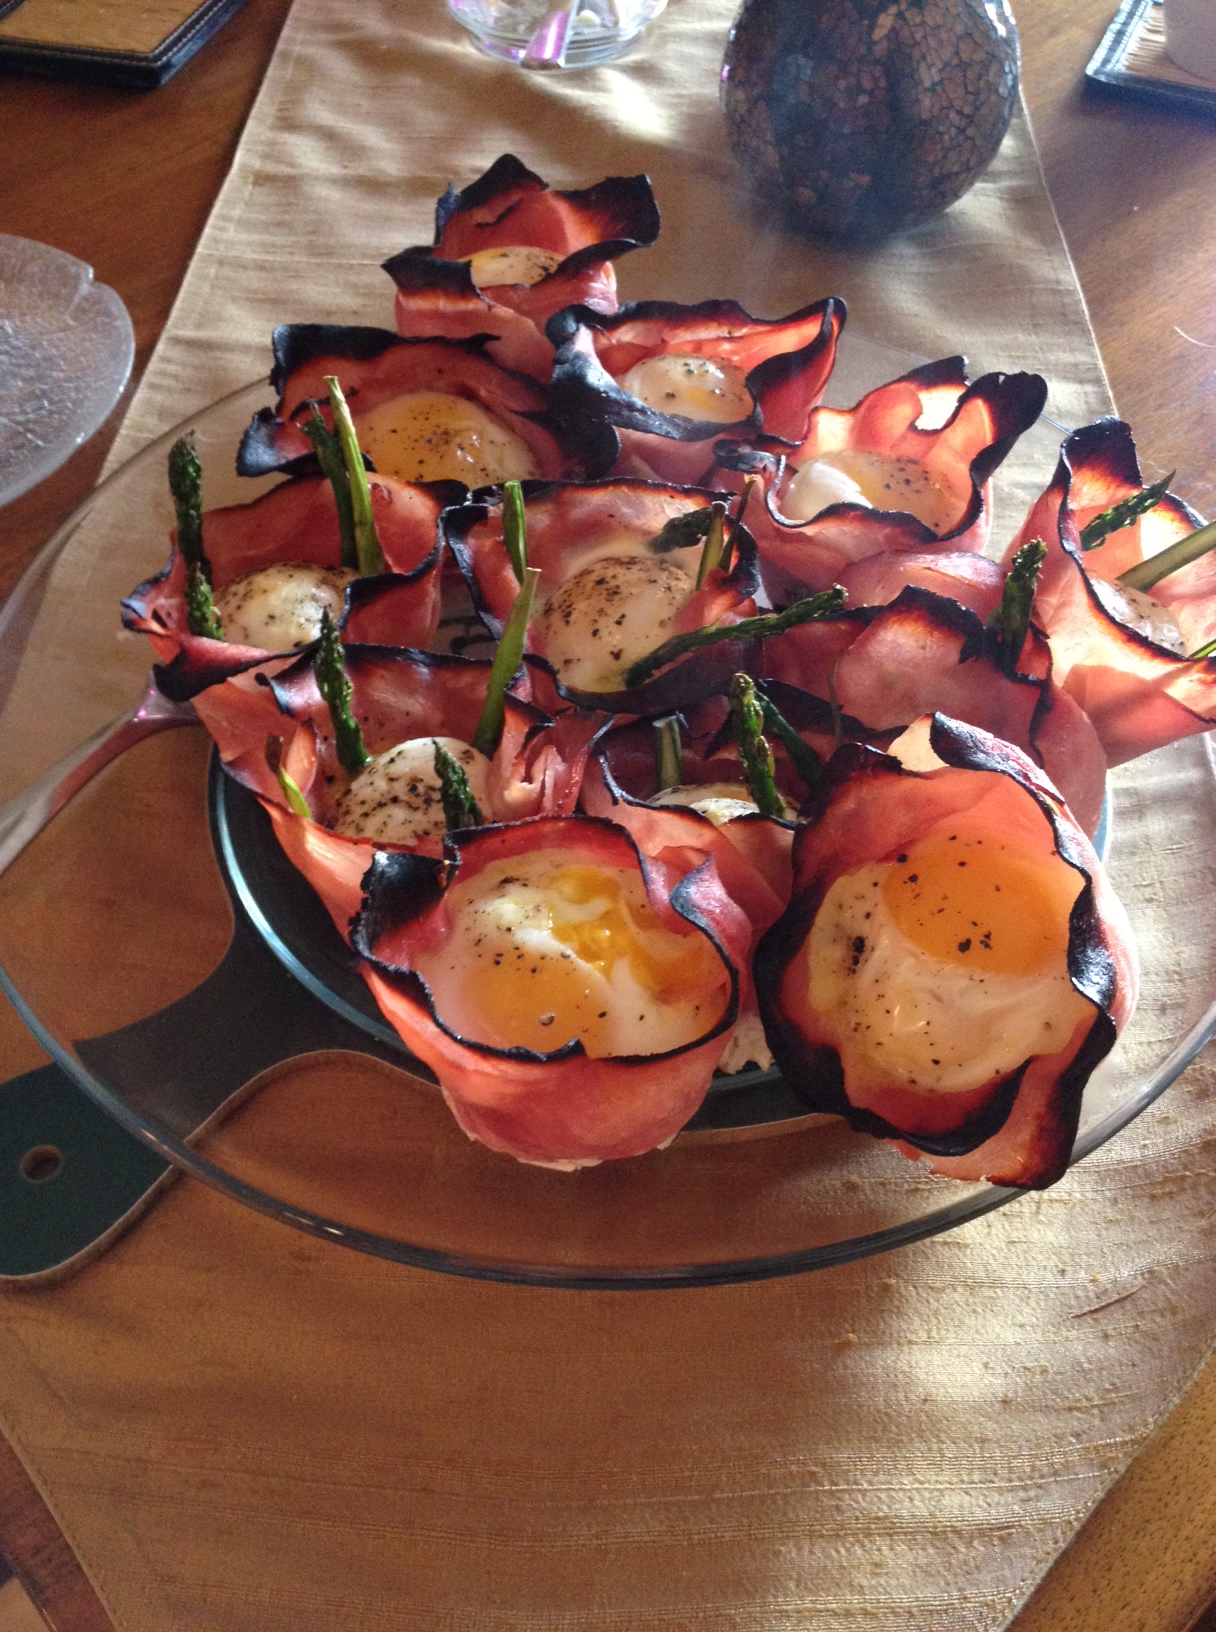
Recipe: Baked Ham and Egg Cups


How was your Thanksgiving? Ours was great-- as predicted, lots of games and too much food. In other words, perfect.

As we mentioned, we were really looking forward to making Thanksgiving brunch to our family. Our choice needed to fit two main criteria: fairly light (Thanksgiving dinner later!) and easy enough to assemble for 7 people.

After seeing a few variations floating around Pinterest, we made egg cups for brunch earlier this year and decided that they'd fit the bill nicely for  our Thanksgiving morning brunch. We made two variations and were happy with both results, so we thought we'd share! They are so cute and really, really easy... plus, the world is your oyster when it comes to the toppings -- you can really add any combination of ingredients your little heart desires.

Laura went the traditional route and made Denver-esque cups by adding diced peppers and onions with cheddar cheese to each cup. Ali got creative and made the clear winner of the day - she blanched asparagus and added two spears to each cup with a tiny bit of cheddar in the base, then served them with a Hollandaise sauce.

We left the crispy edges but you could trim them or get really crazy and cover them with foil while baking.

In our opinion, this is a handy staple to have in our back pockets for brunch with the girls, for family, or after a particularly long night out. Cheers! (with our ham and egg cups.)


Ham and Egg Cups -


  1. Preheat oven to 375.

  2. Spray a muffin pan with cooking spray or lightly oil. (We used popover cups this time because we wanted more room for add-ins, but have previously used muffin tins and it works just as well!)

  3. Line each cup with two slices of ham, pressing into the bottom of each cup.

  4. Add desired toppings, then carefully crack one egg into each cup.

  5. Bake for 25 minutes or until egg is cooked through. Each cup should easily lift from the tin.

Saturday, September 15, 2012

Slutty Brownies


Happy Saturday!

The Londoner is basically a genius with the best hair ever. I love all of her posts and recipes, but I've had her Slutty Brownies bookmarked for a long time to make for my baby bro. He's away at college, studying hard at nuclear engineering (proud sister alert!) and I thought today would be the perfect day to whip up a batch. Nothing like a triple dose of sugar to fuel his late night cram sessions studying, um, whatever it is that nuclear engineers do.

His incredible metabolism annoyingly balances out his incredible sweet tooth quite nicely, and I'm grateful that I have somewhere to send these off to so that I don't eat them all by myself. I did taste test just one (swear) and oh my goodness.

These are ridiculously easy, hence the name. I followed her recipe to a T, springing for the Double-Stuf version AND Ghirardelli brownie mix - nothing but the best for you, bro!

Tuesday, August 14, 2012

Four Ingredient Fat Free Stir Fry Sauce


I make some variation of stir fry roughly once a week. Its healthy, so good, and can be accomplished in about 5 minutes flat (especially if you're willing to invest in some Trader Joe's frozen stir-fry veggie mixes for the occasional emergency).

I am, by the way, totally aware that stir fry typically involves flash-frying the vegetables in a hot pan with oil, so the title of this is slightly misleading. And I'll admit, a heavier sauce with sesame oil or peanuts really can't be beat.

BUT! If I'm looking for an uber-healthy dinner option that doesn't taste like Fiber One after a long weekend of eating and drinking (ahem), I'll make this pseudo-stir fry and happily dig into a spicy, sweet and salty bowl of vegetables over brown rice. I steam my vegetables of choice until they're perfectly crispy and juicy, then top with this sauce.

Four Ingredient Fat-Free Stir Fry Sauce


  • Honey or agave nectar

  • Reduced sodium soy sauce

  • Chili garlic sauce

  • Sesame seeds*

Combine 1 part honey to two parts soy sauce. Add chili garlic sauce to taste, then mix and add sesame seeds.

*Sesame seeds add a nominal amount of fat: 1.5 grams in 1 tsp. Omit if you'd like!

Monday, July 2, 2012

Turkey & Feta Burgers

I don’t know about you, but every time my windows are open and I get a whiff of that glorious grill smell from one of my 2,695,597 Chicago neighbors, I’m guaranteed to spend the remainder of the day majorly craving a big fat burger. (Sorry, veggie friends!) However, since I don’t want to be a big fat anything, especially during bathing suit season, I save the burgers for special occasions. Our mama happens to make the best burgers in the world, so it’s worth waiting for. Or, you know, that one I ate last night after a few Corona Lights at a friend’s pool. Summer Sunday night totally = special occasion, right? :)

I feel like a lot of flavor can make up for a lack of finger-licking grease pretty darn well, so I make some version of turkey burgers just about once a week with various combinations of spices and add-ins. Last week, I made turkey burgers with reduced-fat feta mixed in, topped them with green olive tapenade and served with arugula and tomato salad. They were pretty awesome, if I do say so myself, so I thought I’d share.


Fancy cell phone photo via moi


Turkey & Feta Burgers


Makes 4 huge or 6 normal sized burgers

  • 1 package of ground turkey (I use 93/7 – but do 99/1 if you’re feeling extra healthy!)

  • 4 oz. crumbled reduced-fat feta cheese

  • ½ cup finely diced onion

  • 1 tsp garlic

  • 1 tsp salt

  • ½ tsp red pepper flakes (or to taste)

  • 1 egg, beaten

  • 3/4 cup panko bread crumbs


  • Green olive tapenade (optional)


  1. Combine all ingredients, mix with your hands. Form into patties. Grill over medium heat until cooked through.

  2. Top with green olive tapenade if you’re into that kind of thing.

  3. Enjoy!